Setting up Google Analytics tracking and Facebook tracking on your Shopify store is very easy and straightforward. In fact, Shopify couldn’t have done a better job at making this step simple. However, Pinterest Tracking is a bit more work.
Why Shopify decided to make Facebook tracking so easy but not Pinterest is completely puzzling to us. It could be because Pinterest ads are fairly new as compared to Facebook ads but that’s just a wild guess. If you were unsure how to do it, don’t worry, just follow the simple steps we have for you below.
![]()
Setting Up Google Analytics Tracking for Shopify
Step 1:
To set this up, in your Shopify admin account, go to Online store and click on Preferences.
Step 2:
- Scroll down to Google Analytics. Here you will paste in your Google Analytics “Tracking ID”. The one that looks like this: UA-XXXXXXXX-X

Figure 1: Under Google Analytics in Preferences, paste your Google Analytics Tracking ID in the text box. - Click Save in the top right corner.
- For Enhanced Ecommerce, don’t forget to check Use Enhanced Ecommerce and click Save:
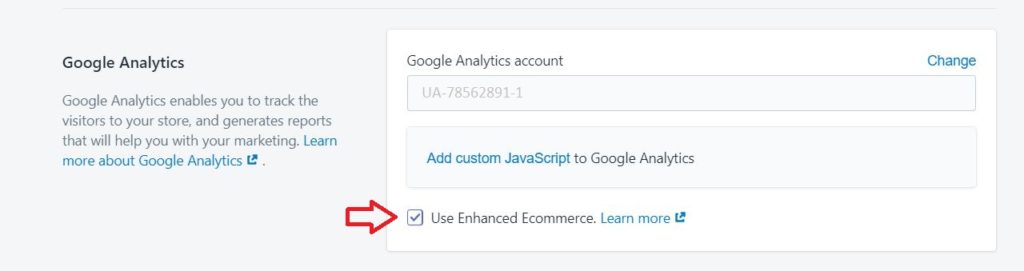
Figure 2: Under Google Analytics in Preferences, check Use Enhanced Ecommerce.
How to Find Your Google Analytics Tracking ID:
- Visit your Google Analytics account.
- Click on Admin:

Figure 3: Click on Admin in your Google Analytics account. - Under Property, click on <> Tracking Info, then click on Tracking Code:
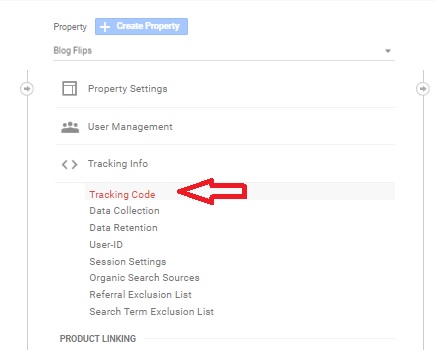
Figure 4: Click on Tracking Code under the Properties category. - Copy the code under Tracking ID that looks like the one below:
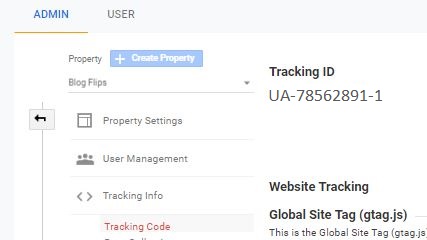
Figure 5: Copy the Tracking ID from the Property category.
Should I Use Google Tag Manager instead of Google Analytics for Shopify Tracking?:
You certainly can but it’s a little more involved. This process is recommended for more advanced users, so we will not be covering it. However, if you are still interested in using GTM for analytics tracking of your Shopify store, we would recommend watching this step-by-step guide we found.
Setting Up Facebook Tracking for Shopify
The setup for Facebook Tracking is just as easy as the setup for Google Analytics tracking with Shopify.
Step 1:
To set this up, in your Shopify admin account, go to Online store and click on Preferences.
Step 2:
- Scroll down to Facebook Pixel. Here you will paste in your Facebook Pixel ID. It will look something like this:

Figure 6: Paste in your Facebook Pixel ID. - Click Save in the top right corner.
How to Find Your Facebook Pixel ID:
- Visit your Facebook Ads Manager
- Go to All Tools > Measure & Reports > Events Manager > Pixels:
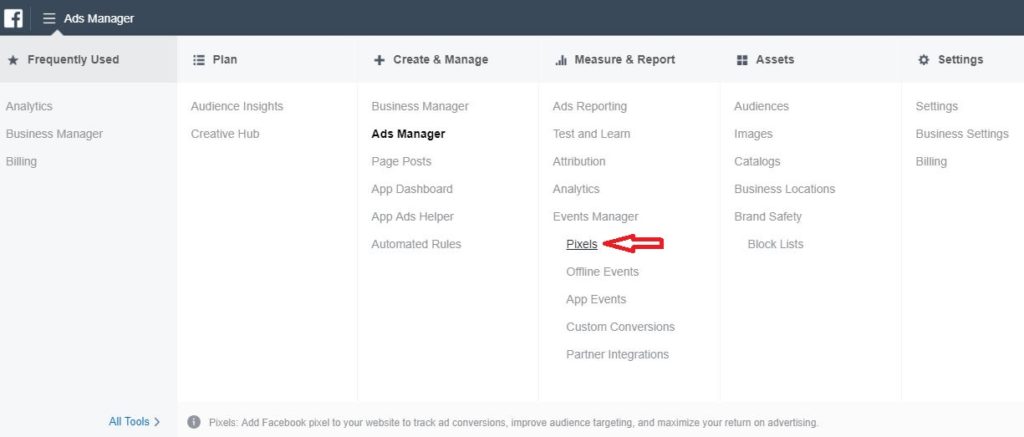
Figure 7: Go to Pixels under Events Manager. Click here for a shortcut: Facebook Events Manager
- Your Pixel ID is located below Data Sources as can be seen below:

Figure 8: Copy your Pixel ID.
Setting Up Pinterest Tracking for Shopify
Setting up Pinterest tracking for your Shopify store is a little bit more involved, but it is not a difficult process. It only takes 3 steps to complete however, it involves going into the code to paste more code.
Related:
How To Install the Pinterest Tag for Shopify – Full Guide
If this scares you a bit, it shouldn’t! However, if you really don’t feel comfortable, then I recommend reaching out to a developer to ask for help. If you want to try it yourself, it only takes about 6-10 minutes to complete. If you are interested in doing this, check out this tutorial.
Bonus:
Skip to Checkout with Shopify for Free / Setting up One-click Checkout for Shopify
One thing that is very useful is to be able to send your customer directly to checkout without having to first place the item into a cart. This allows for a smoother checkout process and reduces the number of abandoned carts.
The downside to this is that it increases the number of abandoned checkouts. To know which method is better for you, I suggest you do some A/B testing on this for your specific shop.
If you are using Shopify like we are on one of our websites, you have two options to do this.
Option 1 (Not Free):
The first option is to use the Shopify plugin that allows you to easily do this. It costs $4.99/month. We have never used it so we don’t know how well it works. We do know that it has 5 stars with 44 reviews.
If you are interested in this, you can check it out here. Apparently, they give you a 3-day free trial. This is useful if you happen to have a ton of products and don’t have the patience of doing the free step below for each product.
Option 2 (Free):
This is the option we chose. We could not justify paying a monthly fee of $29 to use Shopify and paying an additional $4.99 per month for the skip to checkout functionality. If it was a one-time payment then possibly, however, because it is a recurring monthly payment, we decided against it.
Adding this additional monthly payment would increase our Shopify monthly costs by 17% (for one single plugin). Not worth it!
After a little research, we were able to find a simple solution under help.Shopify.com that was free. It uses permalinks to pre-load the cart. With this method, you can only do it with one product at a time. It is not a very efficient method if you have many different products in your store.
Step 1:
Go to your Shopify Admin account and navigate to All products.
Step 2:
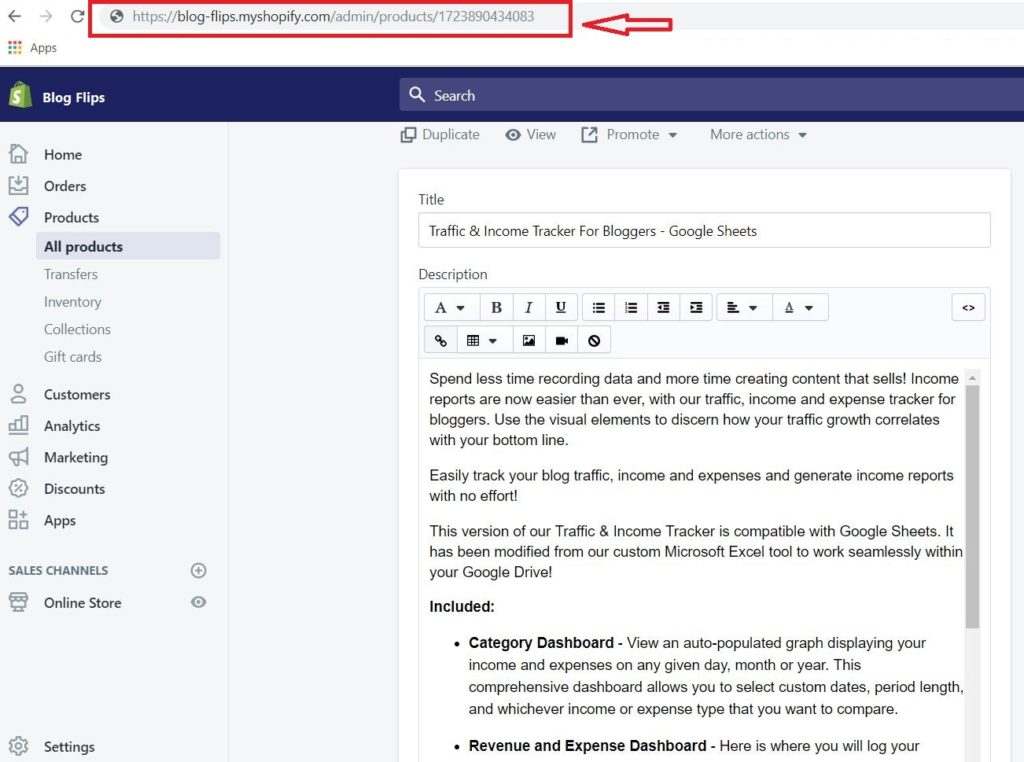
Under Products, choose the product you would like to skip to checkout for. In this example, we are choosing our Traffic & Income Tracker for Bloggers digital product:
![]()
Step 3:
After choosing your product, go to the address bar and add .xml to the end of the URL:
Step 4:
After adding .xml to the end of the URL, you should see something like Figure 11 below. You will then locate and look for <id. Once you locate <id, you will copy the number right before . This is the variant id:
Step 5:
Finally, you will take your shop URL, add /cart to the end of the URL, add /variant id and finally add :1. Here is what it should look like:
https://shop.blogflips.com/cart/14726785957923:1 [this is only an example URL]
That’s it! The link you generate above can be used to send any customer straight to checkout.
Here is an example of one of our Traffic & Income Tracker For Bloggers link that sends you straight to checkout on our other website: Go Straight To Checkout